Note: This is casual advice! Use entirely at your own risk! 🔥
As of the time of authoring this remote networking tome, I am facing an almost certain heart transplant next month.
I will have to wait in the hospital for a heart — hopefully just a couple weeks, then substantial more time for surgery and recovery. Since this could add up to one to two months or more, I want to be able to continue podcasting, creating mostly sill memes and my independent conservative political activism.
To make my workflow smooth, I’ll need a stable internet connection and access to my home LAN (Local Area Network) and NAS (Network-Attached Storage).
I was told that although medically my hospital is state-of-the-art with some of the world’s best doctors — their WIFI sucks! 😿
My best option for connectivity is either using my phone as a WiFi hotspot or Bluetooth tethering. I opted for Bluetooth. So, let’s begin there.
Bythe way, here’s the gear I am using:
- Android phone
- TP-Link Router
- Western Digital NAS
- Windows 11 client
Configuring Bluetooth Tethering
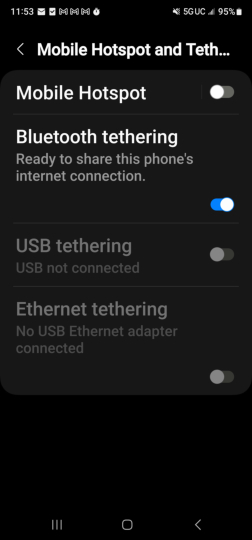
On Android phone navigate to: Settings / Connections / Mobile Hotspot and Tethering. Then toggle Bluetooth tethering ON.
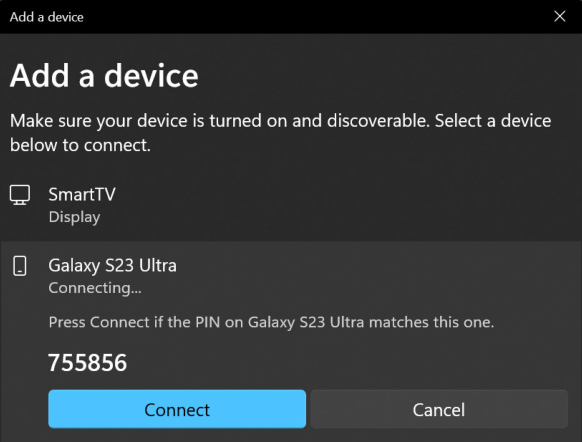
On Windows 11 PC navigate to: Settings / Bluetooth & devices. Then click Add device. On Add a device page click Bluetooth. A screen will pop up and you should see your phone listed. Click that…
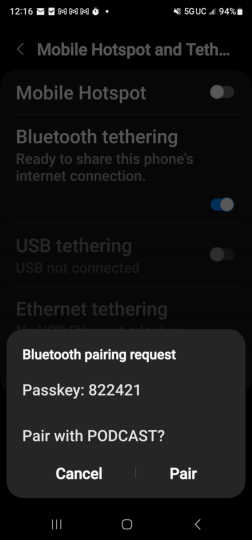
Next, hit Connect on your computer and Pair on your phone. And you are almost all set. I got tripped up here thinking I was all set. Oops! 😁
Back at your computer you should still be at (Bluetooth & devices). Click the settings dots … and click Join Personal Area Network (PAN).
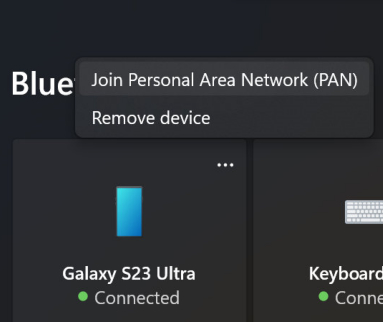
On the next screen select Access Point the click Connect.

Now you are all set! 😁 Feedback should read “Connection successful!”
You won’t be able to access your LAN and NAS yet, but you can test your connection at this point to the Interweb. To do the best test, make sure WiFi is off on your computer or your cable is disconnected from your LAN.
Configuring TP-Link Router for VPN Access
Via your computer (connected to your LAN) web browser, log into your router’s control panel. You will have to be connected back to your LAN via WiFi or cable.
Your router’s IP should look something like this: https://192.168.0.1/
Note: Consult your router’s manual if that is not the correct IP address. 💡
Note: According to TP-Link, you may want to do the following:
Before you enable VPN Server, we recommend you configure Dynamic DNS Service (recommended) or assign a static IP address for router’s WAN port and synchronize your System Time with internet.
Now, click the Advanced tab. Then on the bottom left click VPN Server. Then on the dropdown click PPTP VPN.
Now, toggle all the options, add a user/password then hit Save.
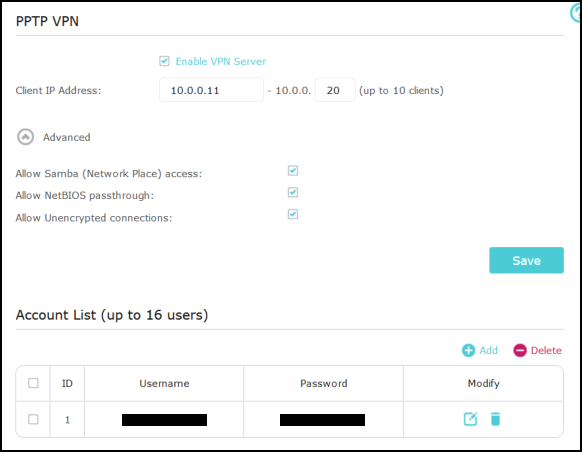
You are now ready to rock and roll!
Configuring Client Computer to Access VPN
Note: Once done, you should be able to access your VPN from any device that is connected to the internet anywhere in the world! 🤓
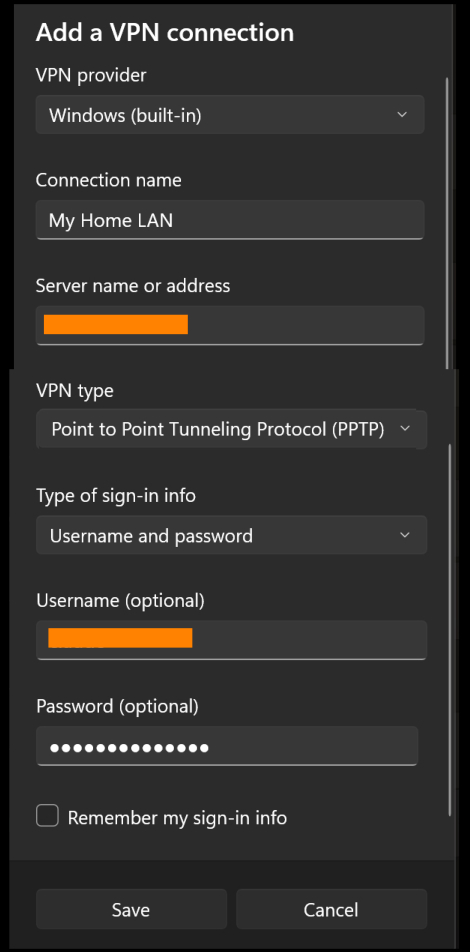
On your Windows 11 PC, go to Settings / Network and internet / VPN. Next, on the far upper right click Add VPN.
Before proceeding further, you will need the IP address of your router’s internet connection. If you type in What’s MY IP address at DuckDuck search, they will provide it for you.
On the screen that popped up, toggle from any dropdowns and fill in all the relevant information. Connection name can be anything. Server name or address is your IP address. VPN type is Point to Point Tunneling Protocol (PPTP). Type of sign-in info is Username and password.
You can type in Username and Password now to connect right away, but I strongly recommend for security reasons that you do NOT toggle Remember my sign-in info! Click Save.
Final step is to click Connect once your settings are saved. Now you are one happy camper!
If your gear or operating system is different, I hope to have at least given you a head start.
Note: If my blog has helped you out, I do have a Gift Jar. 💰
Be well,
Claude


